Skip to content
Times Bull
Times Bull
Home
Photos
Videos
Web Stories
Live Blog
Shorts
Youtube Videos
For You
Whatsapp
search
Live Blogs
Whatsapp
Business
Gadgets
Auto
Astrology
India
Entertainment
Sports
Hindi News
Automobile
Biz
Bharat
Astro
Cricket
Entertain
Food
Career
Health
jobs
Education
lifestyle
Recipes
State
World
Delhi
Uttar Pradesh
Madhya Pradesh
Rajasthan
Bihar
Haryana
Chhattisgarh
Himachal Pradesh
Jammu & Kashmir
Maharashtra
Jharkhand
Business
Gadgets
Auto
Hindi News
Automobile
Biz
Bharat
Astro
Cricket
Entertain
Food
Career
India
Sports
Astrology
Education
Entertainment
Health
jobs
Recipes
lifestyle
World
State
State
Delhi
Uttar Pradesh
Madhya Pradesh
Rajasthan
Bihar
Haryana
Chhattisgarh
Himachal Pradesh
Jammu & Kashmir
Maharashtra
Jharkhand
Search
Search for:
Bihar Election 2025
tech news
Bhojpuri Song
business
English news
IPL 2025
EPFO
Nirahua
Samsung
gadgets news
Amazon
Aamrapali Dubey
8th pay commission
Today English news
automobile
gadgets
daily latest news
Timesbull
Government Scheme
weather forecast
auto
gold price today
Flipkart
Aadhaar Card
hindi news
More Tags
7
Kyunki Saas Bhi Kabhi Bahu Thi 2 Spoiler: Vrinda’s Mother Hands Mihir Key Evidence, Will Veeren Secret Be Exposed?
UP School Holidays Announced for August 14-17: Complete Festival Break Details
August 13, 2025 - 9:53 PM
6
8th Pay Commission – Government Gives Official Reason for Delay, Check Here Latest Update
August 13, 2025 - 9:26 PM
7
Must- Try Easy & Creative Tiranga Rangoli Designs for Independence Day Celebrations
August 13, 2025 - 8:52 PM
Bihar Monsoon Alert – IMD Issues Rain, Thunderstorm Warning for Most Districts Next 3 Days
August 13, 2025 - 7:47 PM
7
Poonam Pandey Curvy & Sexy Figure Sets Internet on Fire – See Her Boldest Viral Photos
August 13, 2025 - 6:17 PM
Daily News
Read More
How to Earn Money Online in 2025: 15 Proven Methods (Beginner to Expert)
Kisan Vikas Patra (KVP) Scheme 2025: Complete Guide to Features, Interest Rate & How to Invest
August 10, 2025 - 6:47 PM
How to Open a PPF Account in India: Complete 2025 Guide
August 10, 2025 - 6:34 PM
How to Check Your Credit Score for Free in India (2025 Guide)
August 10, 2025 - 6:30 PM
How to Check Sukanya Samriddhi Account Balance: Online & Offline Methods (2025 Guide)
August 10, 2025 - 6:23 PM
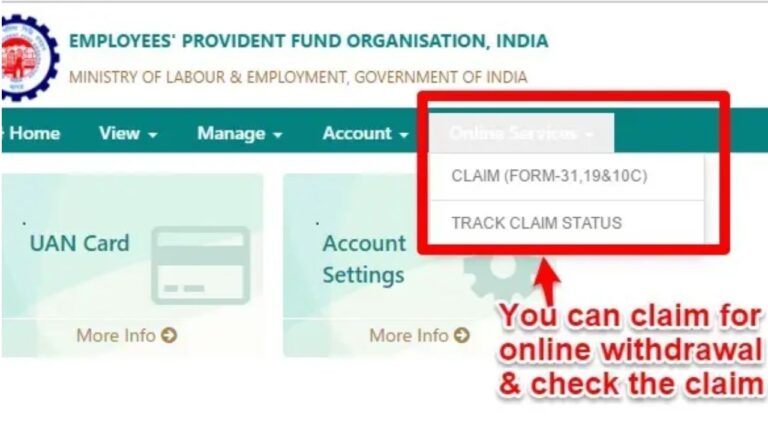
How to Withdraw PF Online: A Step-by-Step Guide (2025 Update)
August 10, 2025 - 6:04 PM
Web Stories
Read More
Honor X9c 5G – Mid-Range Phone Arriving Soon
June 26, 2025 - 9:21 PM
OnePlus Nord CE 4 – Top Deal Under Rs 18K!
June 26, 2025 - 9:00 PM
“Top 7 Reasons Vivo Y400 Pro 5G is a Must-Buy!”
June 26, 2025 - 6:38 PM
Prasidh Krishna under fire for worst Test economy (6.28) vs England
June 26, 2025 - 12:44 PM
Mohammad Kaif praised Shubman Gill’s captaincy
June 26, 2025 - 12:32 PM
Suryakumar Yadav undergoes successful hernia surgery
June 26, 2025 - 12:22 PM
Home
Shorts
Photo Gallery
Videos
Web Stories
For You